
Preheat the oven to 350°F (175°C). Lightly grease a few small ramekins or a muffin tin.
Mix dry ingredients: In a bowl, combine the flour, cocoa powder, sugar, baking powder, and salt.
Combine wet ingredients: In another bowl, whisk together the plant-based milk, oil, and vanilla extract.
Combine wet and dry ingredients: Gradually mix the wet ingredients into the dry ingredients until just combined. Do not overmix.
Prepare the ramekins: Divide the batter evenly into the ramekins or muffin tin. Insert a few chocolate chips or pieces of dark chocolate into the center of each batter portion.
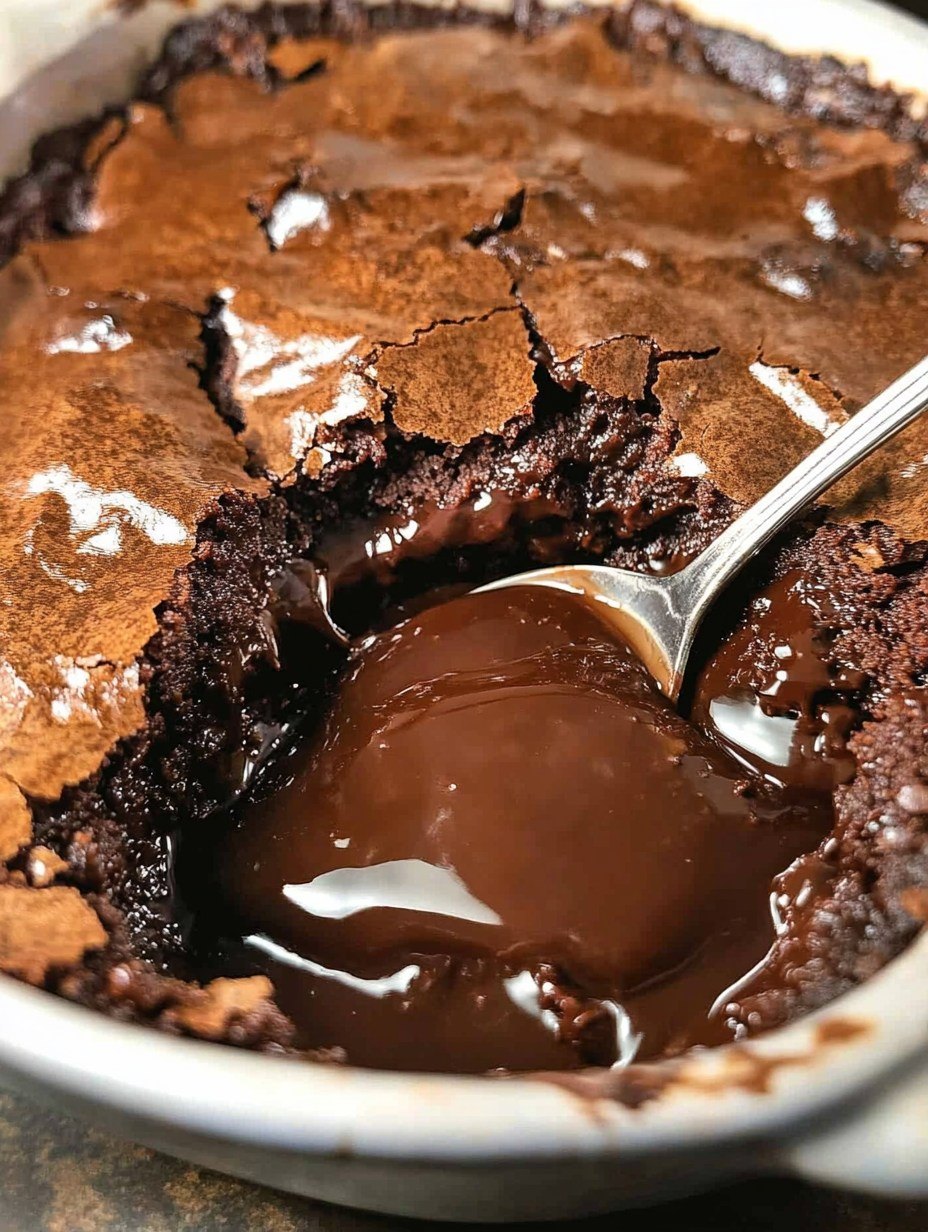
Bake: Place in the oven and bake for 12-15 minutes until the edges are firm but the center remains slightly soft.
Serve warm: Let cool slightly, then serve warm to enjoy the gooey, molten center.
Tips for Success:
Choose the Right Chocolate: Use high-quality vegan chocolate chips or a good dark chocolate bar. The better the chocolate, the richer and more flavorful the molten center will be.
Experiment with Flavors: Try adding a pinch of cinnamon or a dash of espresso powder to the batter for an extra depth of flavor. You can also mix in a teaspoon of orange zest or a few drops of peppermint extract for a unique twist.
Use Ramekins for a Professional Touch: Although muffin tins work well, individual ramekins give a more refined appearance. They also help achieve the perfect molten center.
Watch the Baking Time: Every oven is different, so keep a close eye on the cakes. Start checking at the 10-minute mark. Slightly underbaking is better than overbaking to ensure a gooey center.
Serve Immediately for Best Results: The cakes will continue to cook in their own heat once removed from the oven, so serve them as soon as possible to maintain that perfect molten center.
Nutritional Information (per serving):
Calories: 280
Protein: 3g
Carbohydrates: 36g
Sugars: 18g
Fat: 14g
Saturated Fat: 3g
Fiber: 3g
Sodium: 160mg
Note: Nutritional values are approximate and can vary depending on the ingredients used.
Why Choose a Vegan Molten Chocolate Lava Cake?
Vegan desserts are not only a great option for those following a plant-based lifestyle but also for anyone looking to reduce their intake of dairy and eggs. This vegan molten chocolate lava cake is free from animal products but retains all the indulgence of its traditional counterpart. Made with simple ingredients, it’s also a perfect choice for those with food allergies or dietary restrictions.
How to Store and Reheat Leftovers:
If you have any leftovers (though we doubt you will!), let the cakes cool completely before transferring them to an airtight container. Store them in the refrigerator for up to 3 days. To reheat, place them in a preheated oven at 300°F (150°C) for 5-7 minutes or microwave for about 20-30 seconds. Reheating in the oven helps maintain the cake’s texture.
Make-Ahead Tips:
To prepare ahead, you can make the batter a few hours before baking. Divide it into the ramekins, cover, and refrigerate until you are ready to bake. You might need to add an extra 1-2 minutes to the baking time if starting from cold.
Customization Ideas:
For a fun variation, try adding a teaspoon of nut butter or a piece of caramel to the center along with the chocolate. You could also mix in some chopped nuts or dried fruit to add texture and extra flavor to the cake.
The Perfect Pairing:
Serve your vegan molten chocolate lava cake with a glass of plant-based milk or a warm cup of coffee or tea. The richness of the dessert pairs beautifully with the simplicity of a hot beverage.
Final Thoughts:
This vegan molten chocolate lava cake is proof that you don’t need dairy or eggs to create a decadent dessert that everyone will love. With its rich chocolate flavor, gooey center, and perfect balance of sweetness, it’s sure to become a favorite at your table.
Whether you’re vegan or not, this molten chocolate lava cake is an indulgent, crowd-pleasing dessert that’s easy to prepare and impossible to resist. With simple ingredients, straightforward instructions, and room for customization, it’s a versatile recipe that you’ll want to make again and again.
