
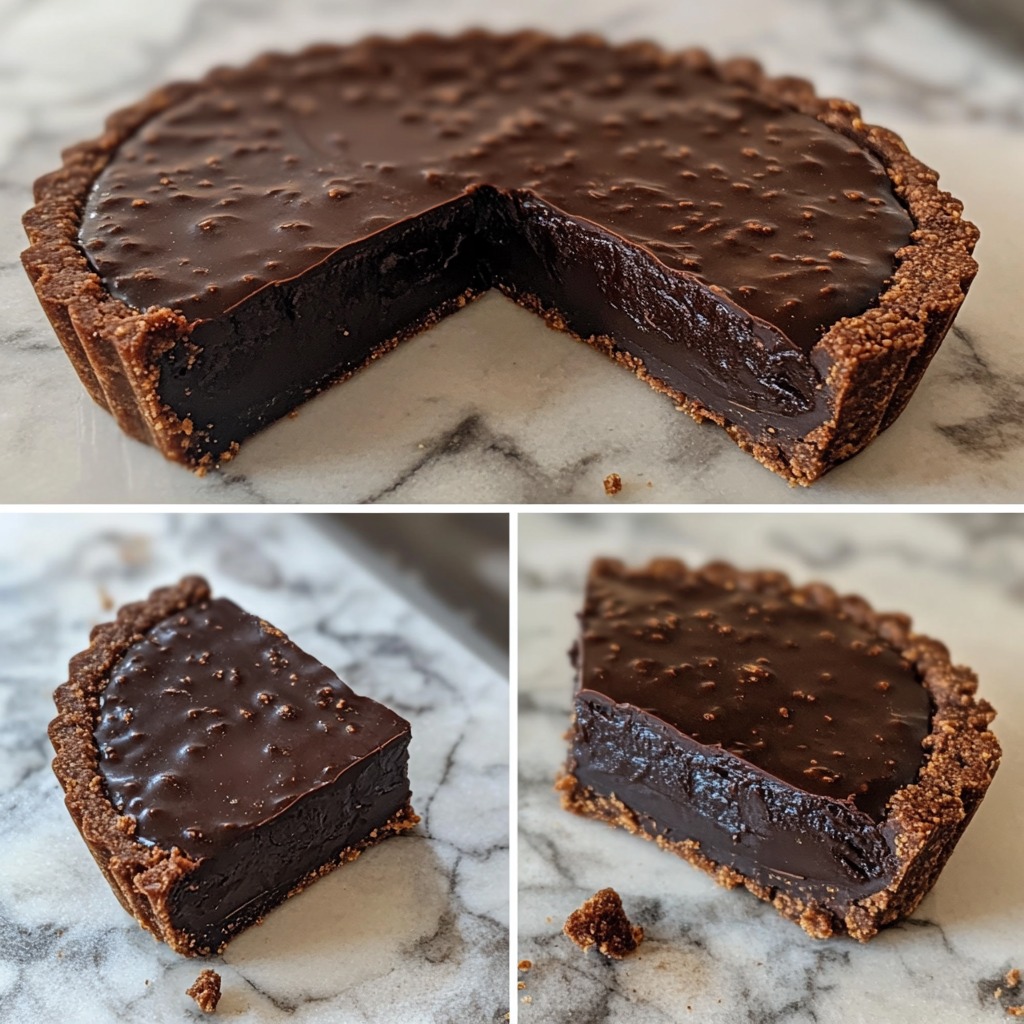
For the Tart Crust:
- Preheat the Oven:
- Preheat your oven to 350°F (175°C). This ensures the crust bakes evenly and crisps up without burning.
- Make the Crust Dough:
- In a mixing bowl, combine 1 1/2 cups almond flour, 1/4 cup cocoa powder, 1/4 cup melted coconut oil, 2 tablespoons maple syrup, and a pinch of salt. Stir until the mixture forms a dough that holds together when pressed.
- Press the Dough into Tart Pan:
- Using your fingers or the back of a spoon, press the dough evenly into a 9-inch tart pan with a removable bottom. Make sure to press the dough firmly across the bottom and up the sides of the pan.
- Prick and Bake:
- Prick the bottom of the crust with a fork to prevent it from puffing up while baking.
- Place the tart crust in the preheated oven and bake for 10-12 minutes or until set and slightly firm to the touch. Avoid over-baking as the crust will harden as it cools.
- Once baked, remove the crust from the oven and allow it to cool completely before adding the filling.
For the Chocolate Filling:
- Heat the Coconut Milk:
- In a medium saucepan, heat 1 cup full-fat coconut milk over medium heat until it starts to simmer. Be careful not to let it boil, as this can alter the texture.
- Melt the Chocolate:
- Place 1 1/2 cups dairy-free dark chocolate chips into a heatproof bowl. Pour the hot coconut milk over the chocolate chips and let it sit for 1-2 minutes to allow the chocolate to melt.
- Mix Until Smooth:
- After the chocolate has softened, stir the mixture until smooth and glossy. If the chocolate doesn’t melt completely, heat the mixture gently in the microwave in 10-second intervals, stirring in between until fully melted and combined.
- Add Sweeteners:
- Stir in 2 tablespoons maple syrup and 1 teaspoon vanilla extract, making sure they are fully incorporated. The maple syrup adds a natural sweetness, while the vanilla enhances the overall flavor.
Assembly:
- Pour the Filling:
- Pour the prepared chocolate filling into the cooled tart crust. Use a spatula to smooth the surface and ensure the filling is evenly distributed.
- Chill the Tart:
- Transfer the tart to the refrigerator and chill for 2-3 hours, or until the chocolate filling has set and is firm to the touch.
- Serve:
- Once the tart is set, remove it from the tart pan and slice it into 8 even pieces. Serve chilled for a refreshing dessert, or at room temperature for a softer texture.
Nutritional Information (per serving, based on 8 servings):
- Calories: 350
- Total Fat: 28g
- Saturated Fat: 15g
- Cholesterol: 0mg
- Sodium: 10mg
- Total Carbohydrates: 25g
- Dietary Fiber: 5g
- Sugars: 13g
- Protein: 5g
Tips for Success
- Crust Tips:
- Make sure to press the crust dough evenly into the tart pan to prevent thin spots that can lead to cracking. You can use the bottom of a measuring cup to press the dough firmly into place.
- Chocolate Options:
- Use high-quality, dairy-free dark chocolate for a smooth and rich filling. If you prefer a sweeter filling, you can use semi-sweet chocolate chips.
- Make Ahead:
- This tart can be made a day in advance. Simply cover and store it in the refrigerator until you’re ready to serve. It also freezes well for longer storage.
- Custom Garnishes:
- Add fresh fruit like raspberries or strawberries, a sprinkle of sea salt, or shaved chocolate on top for extra flavor and an elegant presentation.
- Storing the Tart:
- Store any leftovers in an airtight container in the refrigerator for up to 4 days. For longer storage, wrap slices in plastic wrap and freeze for up to 2 months.
This Vegan Chocolate Tart is a dream come true for chocolate lovers. The rich, creamy filling paired with the cocoa-infused almond crust is pure indulgence, while the natural sweetness of maple syrup and coconut milk makes it a healthier, vegan alternative to traditional chocolate tarts. Whether you’re making it for a special occasion or just treating yourself, this dessert is sure to impress!
Pages: 1 2
